Tuesday 29 March 2016

Nurgle Chaos Champions #'s 073167/2 & 073167/6

These two champions were ignored by me as a kid because they had guns! I was strictly fantasy then and now (although I have a few Rogue Trader projects I want to embark on for this year's BOYL - watch this space) but of course Realms of Chaos let your champions have access to archaic weapons such as bolters and the like. I didn't really like the crossover between the two universes back in the 80's but have lessened my resistance a bit over the years. So these are pretty much the first guns I've painted:


I've gone for some real weathering here, both with corroded bronze and orange rusted armour. I used the sponge technique for this attempt; layering lots of oranges and silvers over each other in small quantities. The final layers were pure red oxide dry pigment bound in a little matt varnish.


 I wanted to avoid the obvious green armour on the right figure, but in hindsight wish I'd added some coloured trim or something to break up the rust. The guy on the left came out better than I'd expected, I wasn't really looking forward to painting him as the pose is a bit shit and the body is the same as I'd previously painted for the fly headed standard bearer, but the two faced head came out pretty well and I quite like the three jewels on his front.


So just 3 more champions to go. I then plan to kitbash/convert some modern plastics into homages to these classic models. As well as those 40k mercenary gangs I mentioned earlier. (At this point I stop myself from even thinking about other, unfinished projects that are in the queue..)

Saturday 19 March 2016

Nurgle Chaos Champion #073167/5

After some brainstorming and assistance from the Oldhammer community on Facebook, I finally managed to finish a banner that I was happy with for my slightly converted fly-guy:


The original idea for the banner image was to do something Ian Milleresque, referring back to his iconic designs found in the RoC books, or failing that, a fly head/fly body. After posting on the Facebook group for some ideas, someone suggested an Ebola design. So after some research I found this:

The image I used for the background (originally the whole banner was going to be in this design, but after some consultation with others in the online community I went for my gut instinct which was to subdue the colours and use it as a background).

I had a go but was not entirely happy (despite some lovely praise), it looked a bit too much like polka dots and really lacked a focus. So I went with my instincts (and a few similar suggestions) and subdued the colours I had used with some darker washes and added a new design over the top. I went for someone else's suggestion; to use Kafka's "Metamorphosis" as inspiration. I found some great images and eventually plumped for a part bug part skull design. Here's a bit more of a close-up of the design:


I tried to get the transparency of the wings by applying very transparent layers of greys/whites over the background using a thinly pointed brush. When I was happy with the design I muddied up the bottom of the banner to show that it may have been dragged through the mud, using some baneblade brown earth washes and some of my Tamiya weathering stick.


For the fly head, I added some pearlescent medium to the greens to give a slightly metallic look to the finish; aiming for a blue-bottle fly appearance. The black areas were highlighted up with blues to add to this idea.

There is another banner bearer within this group, for that one I will definitely be going down the Ian Miller route, it's a much larger banner to try and pay homage to his intricate designs...

Thanks to all who contributed ideas and feedback, hopefully you like the final outcome. Much appreciated!


Thursday 17 March 2016

Creating a scenic photography set-up


I've always been envious of those people who have beautifiul models, photographed beautifully against a stunning backdrop and placed within a wonderful scenic context. I'm a long way off from achieving this and realised that it needed to be rectified! So I got to work..


Initially I was incredibly inspired by James' version at the Realms of Chaos 80's; and set about making my own from some bits and pieces I had laying about at home. I found one of my sons old, unused toddler jigsaw trays, which works perfectly as a frame. It transpired that two layers of my favourite extruded polystyrene would fit inside it perfectly and then I started adding bits of old cork tile for rocky outcrops and engraved in a cobbled path with a pencil, dug out some puddles and cut out a river/bridge section. I also used an old stone to add some texture to the board before adding some old tree armatures, some Marauder goblin spider shields to the bridge and a thin covering of pva and sand to the surface to both add texture and seal the vulnerable polystyrene from the brown aerosol primer I intended to use.


Here's a step by step tutorial:


Blue, extruded polystyrene was used for the base. Here you can see some cobble stones drawn in with pencil onto a textured path and some holes dug out for puddles. It was cut to fit my son's old jigsaw tray.


A bit further in to the project here. I decided to go for a water feature and bravely cut out a section where a stream would go. Bridge sides were made with polystyrene, card squares and a couple of old Goblin Marauder Spider shields and then glue gunned to the path. I realised I could use the frame of the tray to act as a dam for when I poured in the water effects too. Some chunks of cork were added to create some rocky heights and texture was added by pressing a stone into the polystyrene and some sand glued on. Finally I added some crackle paste - seen as the white patches, But this was pretty ineffective.
My 3 year old son wanted to do some making with Dad, so he was given some off cuts and a bit of paint and he made this race track for his cars. He went into great detail about swamps and sinking sand.. He's got skills!

Finally the whole tile was coated with a thin pva and water mix to seal the polystyrene form the forthcoming aerosol primer. At the same time a final sprinkle of fine sand was added.

The whole piece was then spray primed brown (no picture of this stage) to create a muddy undercoat. Then I started drybrushing a range of pale/yellow tones into the muddy areas, greys into the stone areas and some green blues to the water areas. Some final washes of greens and browns were added in the foreground, on the rocks and along the road.

 
To prepare the tile for the pouring of the Woodlands Scenic Realistic Water, I coated the water areas with a gloss varnish. I didn't want the realistic water to burn through the polystyrene or cloud over from the cheap acylic paints I used. 
 

The next stage was to add the grass. After a bit of research and investigation, I decided to go for static grass rather than the flock I use on my Nurgle miniatures. Above you can see the three different blends of colour I used.


This was applied in mixed together and in individual patches using dilute pva glue. The excess static grass was tipped off and the remainder was made to stand upright with the aid of a balloon rubbed onto my jumper.
Here you can see it looking pretty grassy. Some scatter leaves were also applied with a little pva.
 
Finally some clump foliage was added in little clusters.


Here you can see the Woodlands Scenic water settling into the cut out stream bed.


And the finished version, with trees, backdrop and some Nurgle Champions:


Just need to get a decent camera now (these are all taken on my iphone) and an extra light as I currently have just the one daylight bulbed, anglepoise.


Sunday 13 March 2016

Nurgle Chaos Champions #'s: 073201/110 and 073167/1


The next two completed Champions of Nurgle are here finished. After being praised for not using any green on the first three Nurgle champions, I've gone for a fair bit of green here. Pale green skin (with some warmer red glazes) on this chap:


And a rusting green armour on this one:


I've experimented here on creating some severe weathering on his armour using the hairspray and salt technique. It's pretty easy to do and seems to have worked quite well. I definitely used too much salt though as there are still some white residues on the model - which adds to the patina - but more noticeable when I recieved an unexpected salt taste from licking my brushes, which I'm wont to do when blending. There's some other rusting techniques used on this model too - I really should do a tutorial. In fact there's a draft post been sitting amongst my other drafts since about May of last year...

Thursday 10 March 2016

Chaos Champions of Nurgle #'s 073167/4,3 & 8

These are the first three painted Nurgle champions from my newly completed collection. They were painted a little while ago, but needed some touch ups due to gaming wear and tear.


The next three are in progress...

Friday 4 March 2016

All the original Champions of Nurgle

Over the many years since I first became obsessed with Games Workshop's products, I've at one time or another, owned all of the Realm of Chaos Champions of Nurgle bar one. It's only recently and with the enormous help of Graham Bailey (thanks buddy!), that I've actually managed to have them all at once, and therefore I'm on the first step to eventually fulfilling a very long held ambition to have them all painted in a unit to field as a unit of Chaos Warriors in my LatD Nurgle Army.. The final missing piece to the jigsaw was the elusive warrior with axe and accompanying Nurgling on his shoulder, which is where Graham from the Oldhammer community helped me out. So here's my collection positioned in the same places as the page from SoLegends:


And here's that aforementioned page from the catalogue/solegends  that I've looked over many times from kid to adult, dreaming that one day I'll have them all..:


As you can see I've made a few conversions to mine, because I'm not a "purist" collector and I like to improve and make some of my miniatures unique. Especially as I will game with them, sporadically, in the future. I feel that even with a few changes, in this case one with a weapon change and two turned into banner bearers, the models still retain the character inherent in the sculpt. They are still recognisable, for example, as that "Nurgle Champion with the Nurgling on his shoulder". In fact I feel that I've added to the potential for a Nurgling Infestation Gift by adding further Nurglings on the banner poles.

Anyway I'm incredibly proud to be able to have completed this first part of the mission, one off the hobby bucket list! Now to get to paintong them...


Tuesday 1 March 2016

Frostgrave/Heroquest scenery: spiral stairs

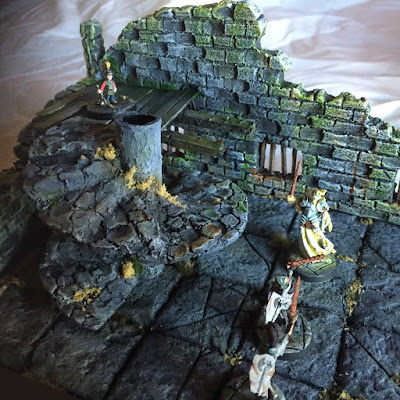
One of the joys about modelling scenery is that problems have to be solved; either with the materials used or the techniques needed to apply the process of making. I have been guilty of over-complicating the process (I'm sure we all have) so I've tried to make a spiral staircase as if it were simply miniature versions of the real thing. Of course I've never actually made a real spiral staircase, or even researched the making of a real one, but in my mind I've simplified how it could be made and applied this thought process to a much smaller model. Here's my finished example:

Come down you little bastard!

I don't think skeletons can deal with stairs very easily...


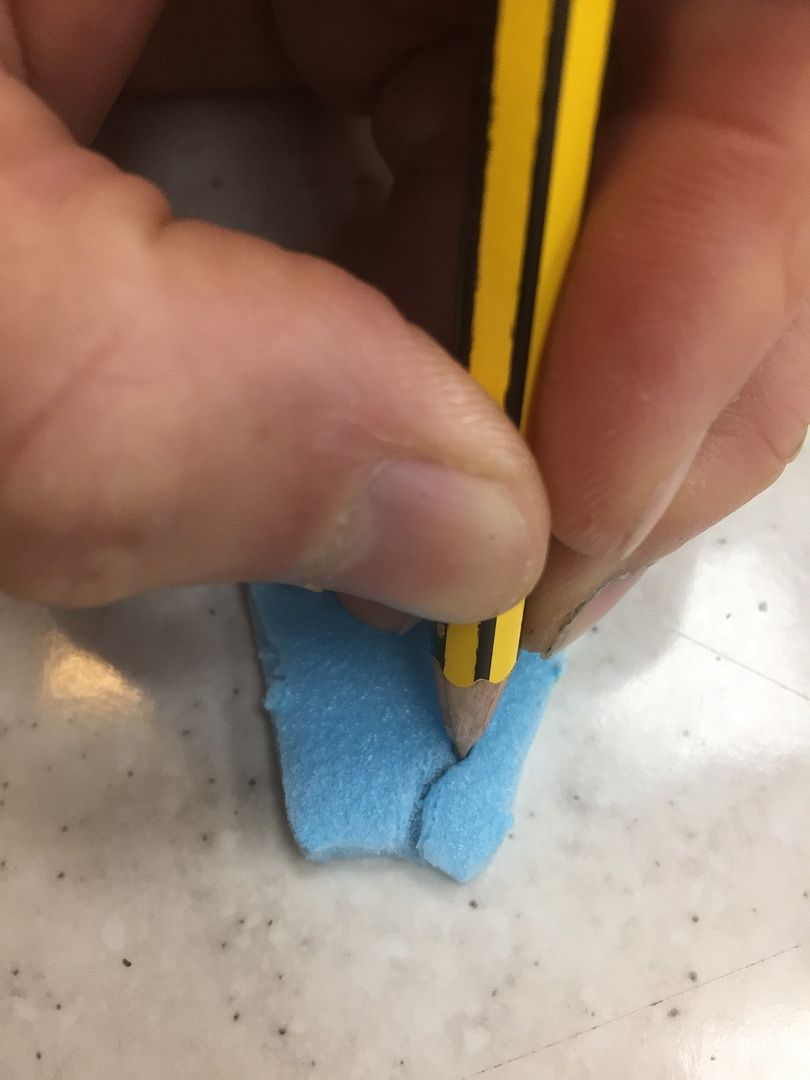
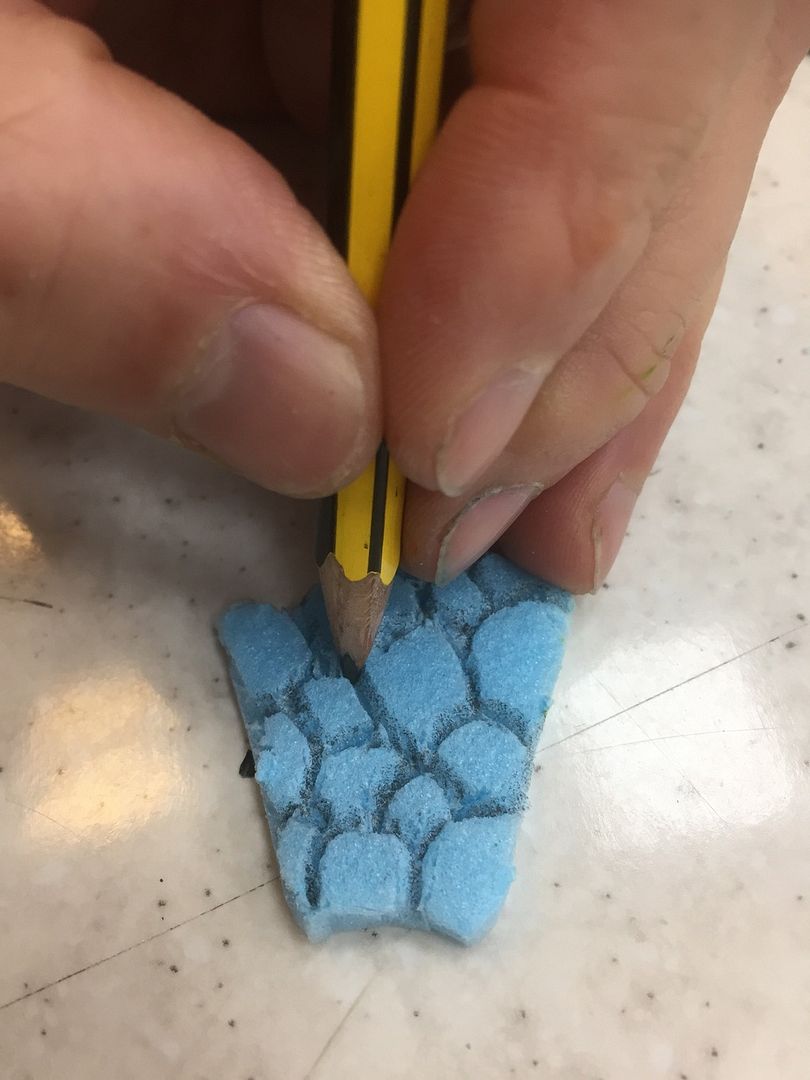
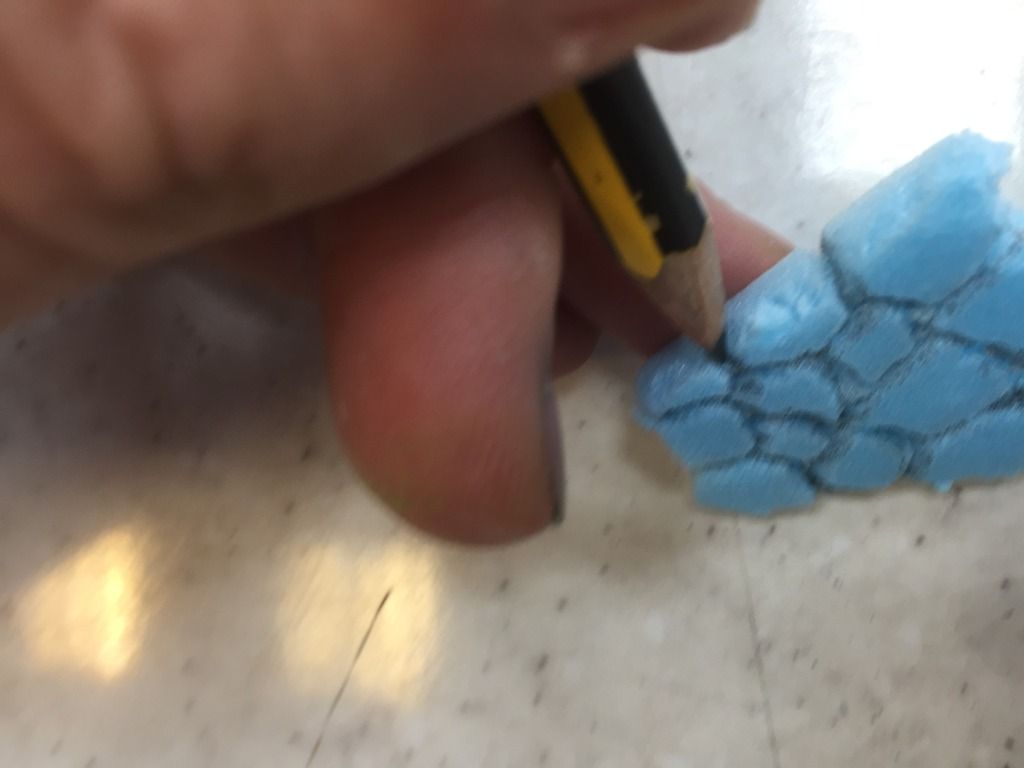
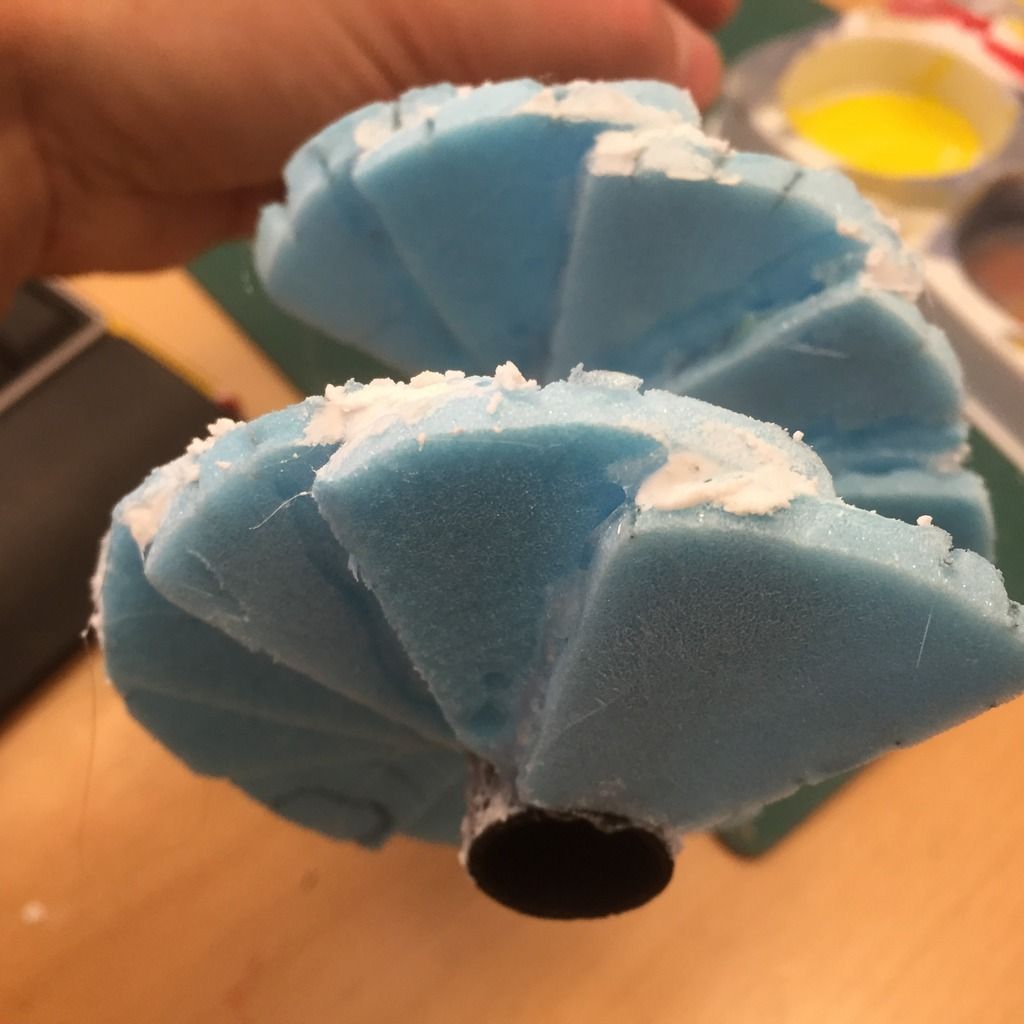
Initially I imagined that each step is made up of several stones (here I've scored the individual stones in with a sharp pencil) which in turn creates one step. Each of these steps has to be the same size and shape:


Making sure the stonework goes around the side of the step too:


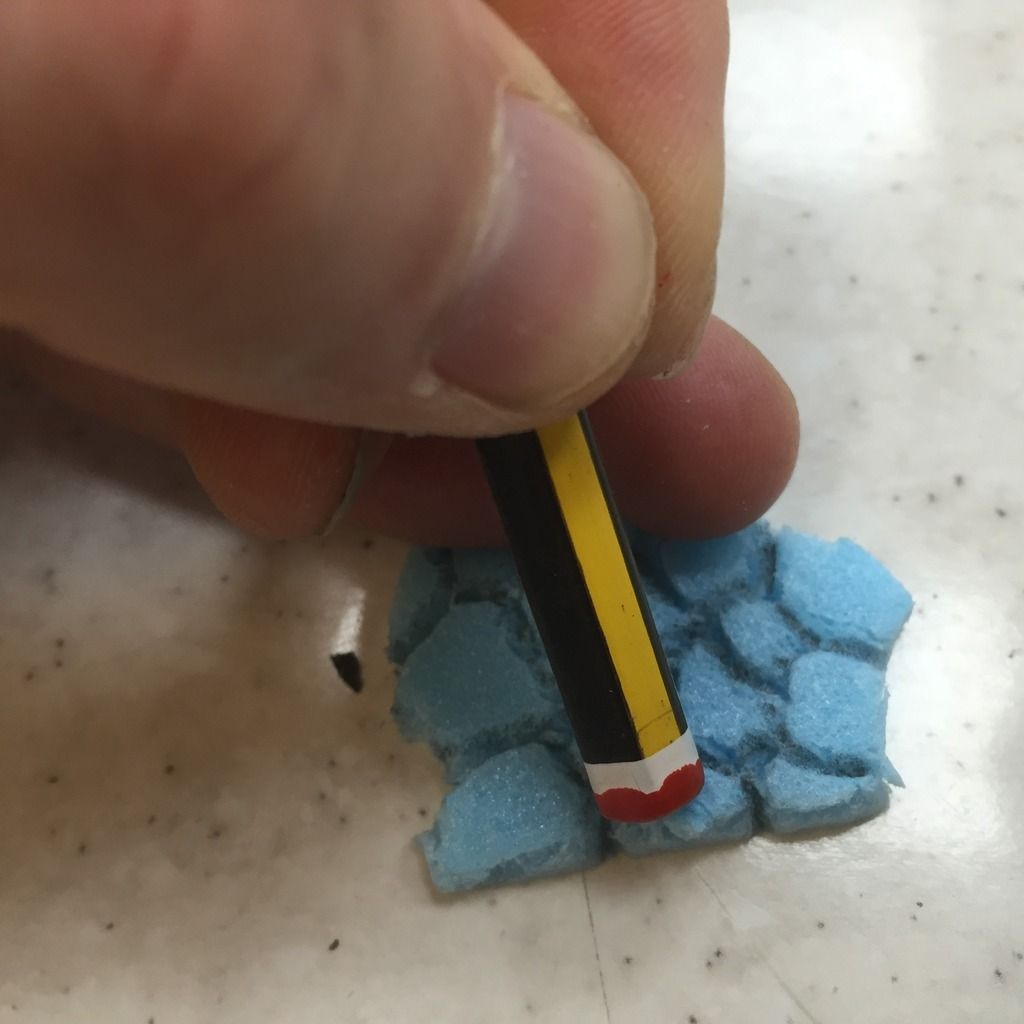
And flattening the worn area of the steps, ie in the middle where the most footfall occurs:


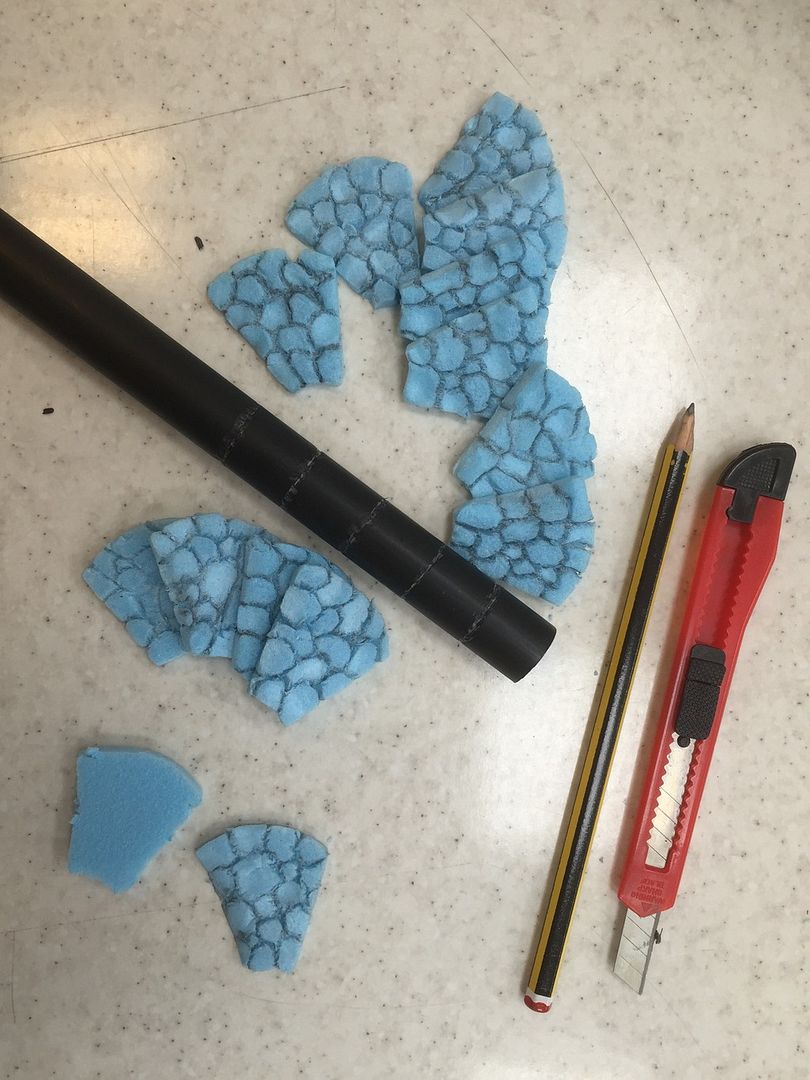
Here's the set of steps, each the same size.


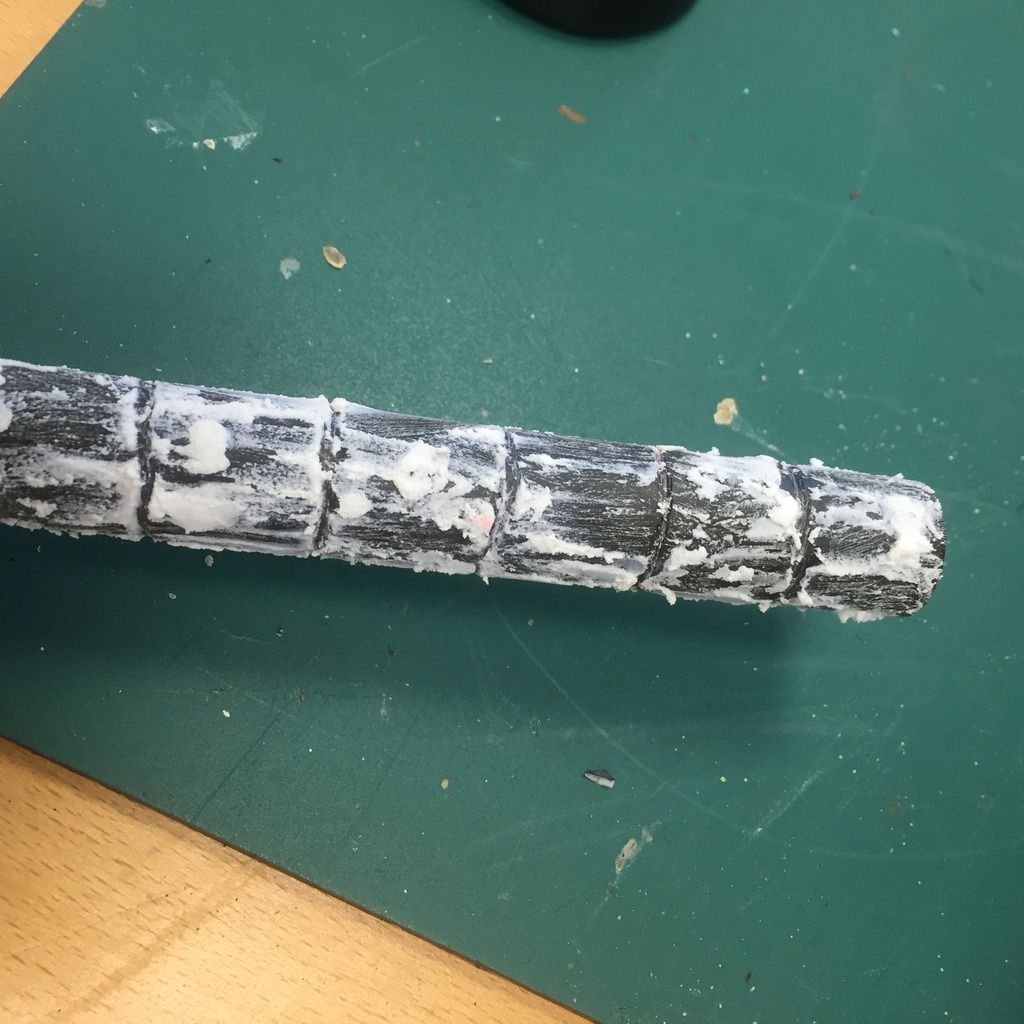
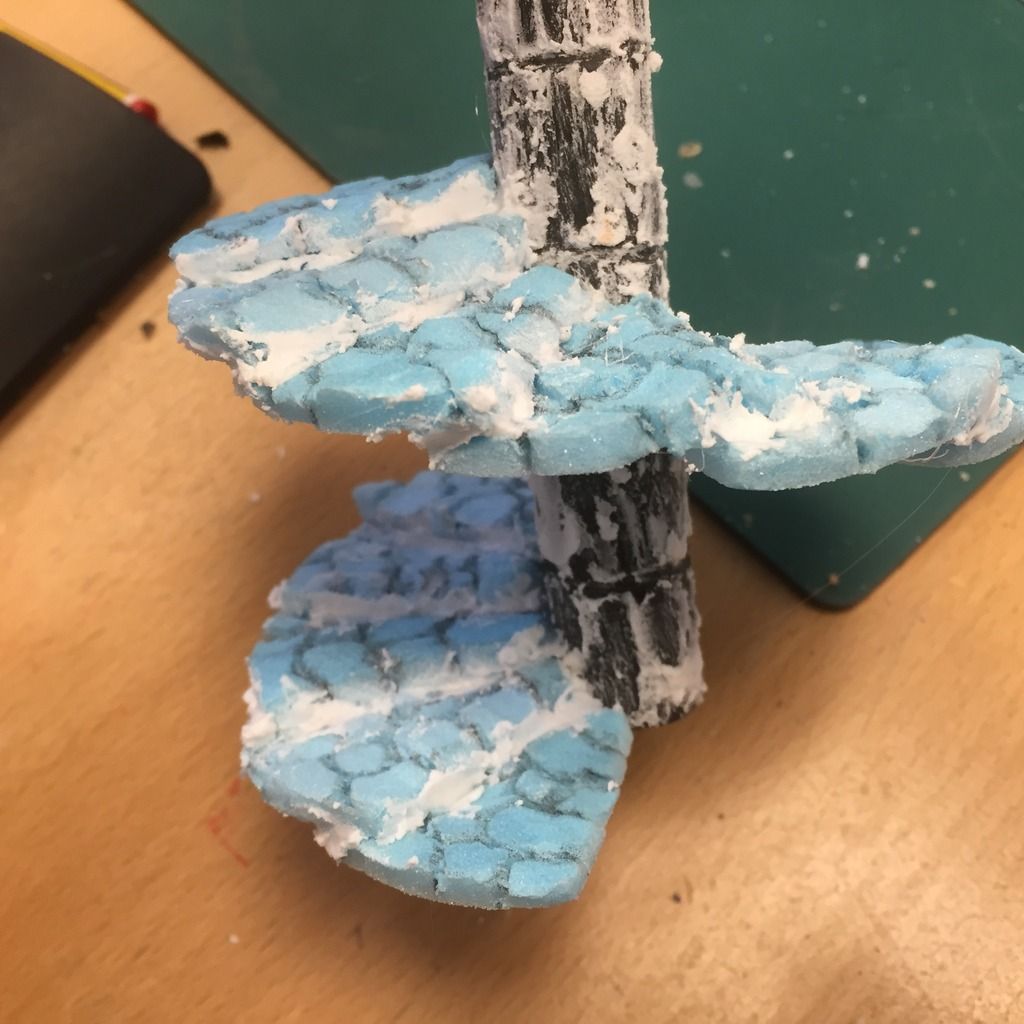
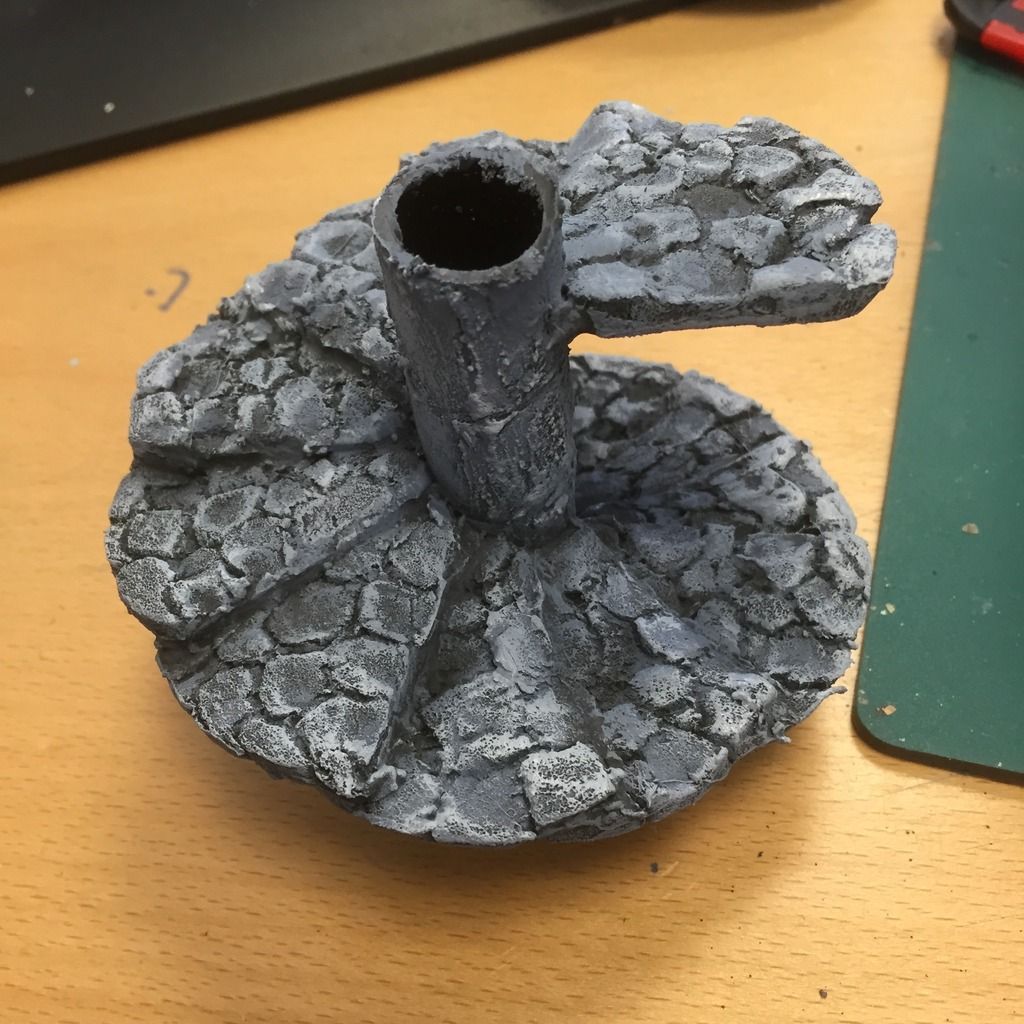
The individual steps have have to spiral around a central pillar, for which I used a plastic rod. To make mine look like stone I textured the plastic rod with some Polyfilla and cut out some grooves to show multiple stones on top of each other to make the pillar:


Each step then has to be attached to the step underneath it and to the central pillar (ie the base step first then work your way up the spiral). In real life I imagine cement would be used for this, but for my model I've used a hot glue gun (as the glue does not melt the volatile extruded polystyrene, but the heat can, be careful). The gaps in between the steps would be filled and secured with further cement, here I've simply added some more Polyfilla into the gaps:


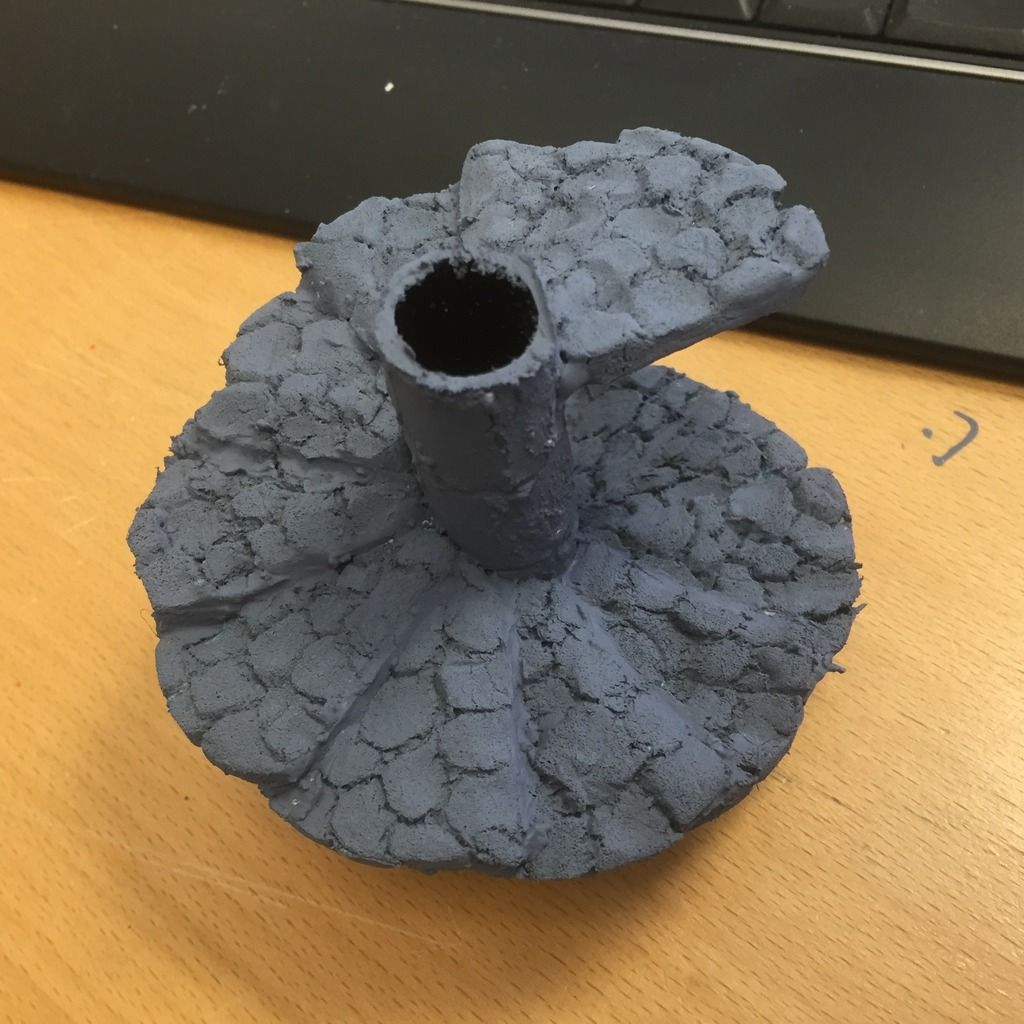
And that's the modelling finished! For painting I just used my usual, cheap, grey decorators paint as an undercoat:


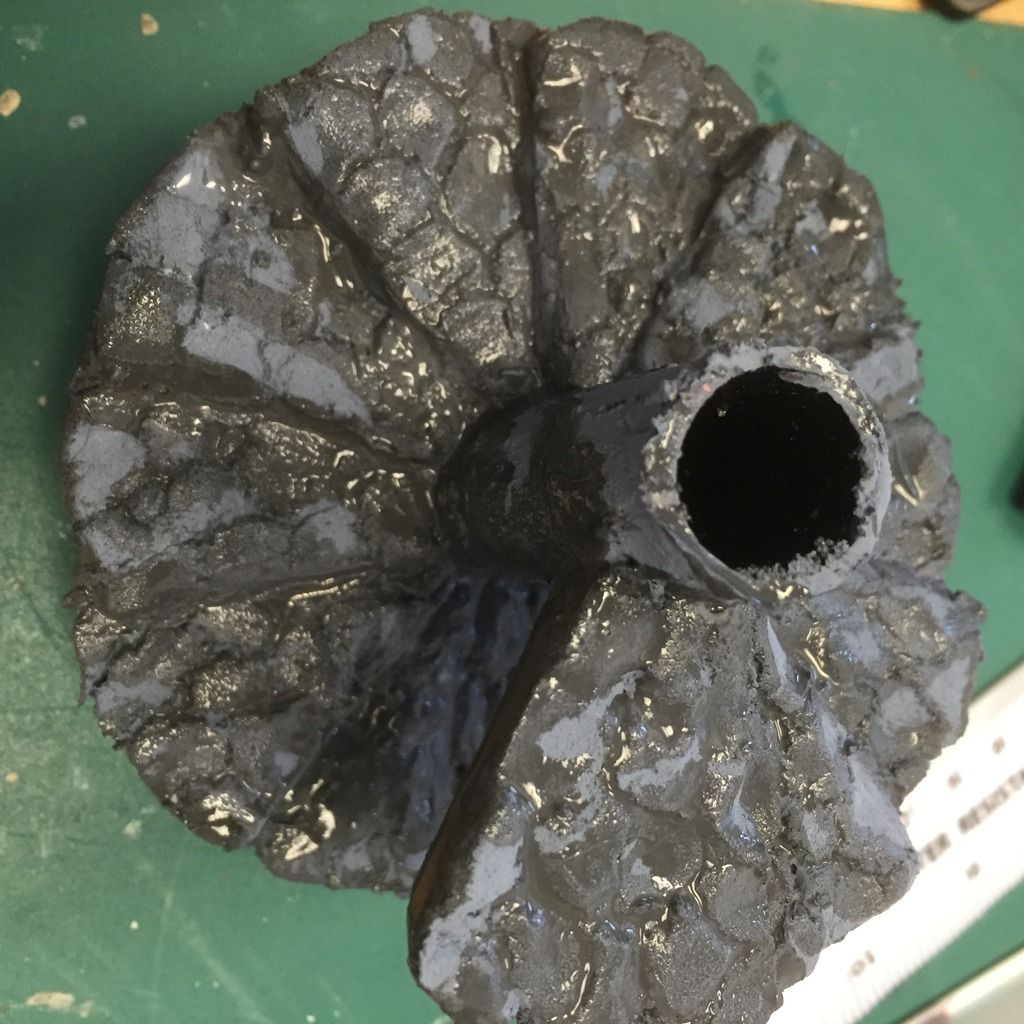
Washed a darker grey into the recesses:


Highlighted/drybrushed up with two lighter greys:


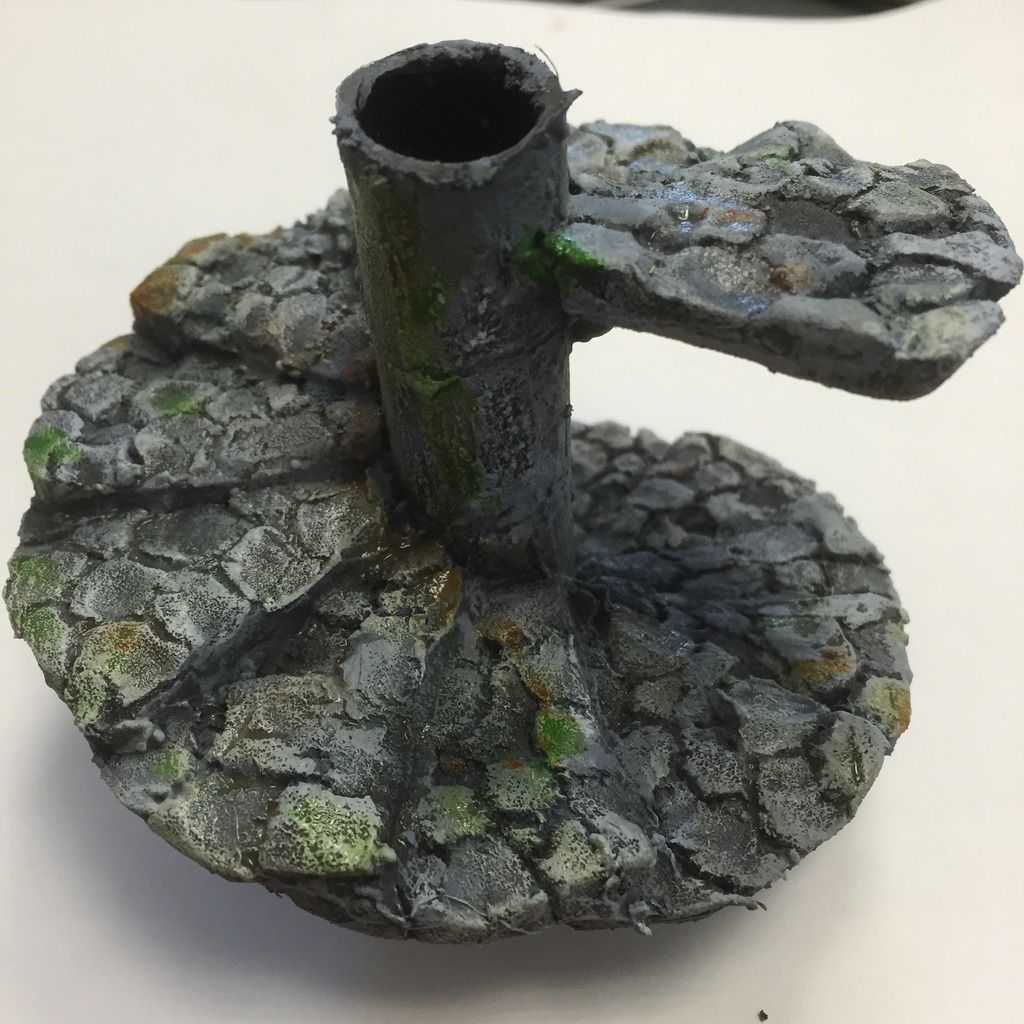
And then weathered in some moss with some green and brown washes:


And the final stage was to add some real moss and static grass.


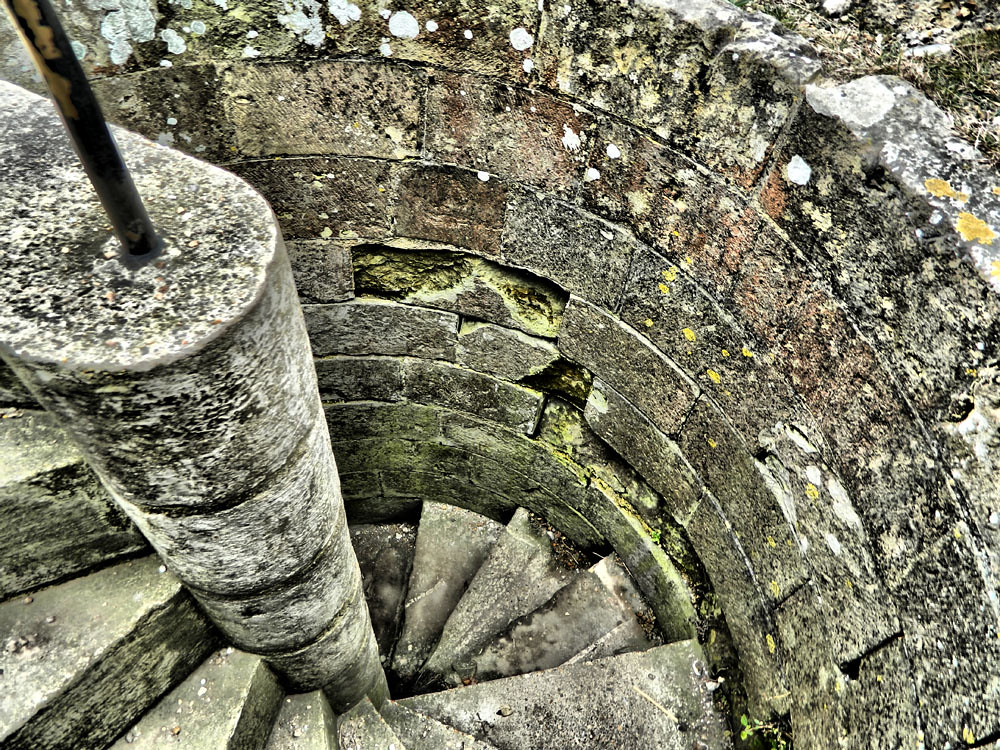
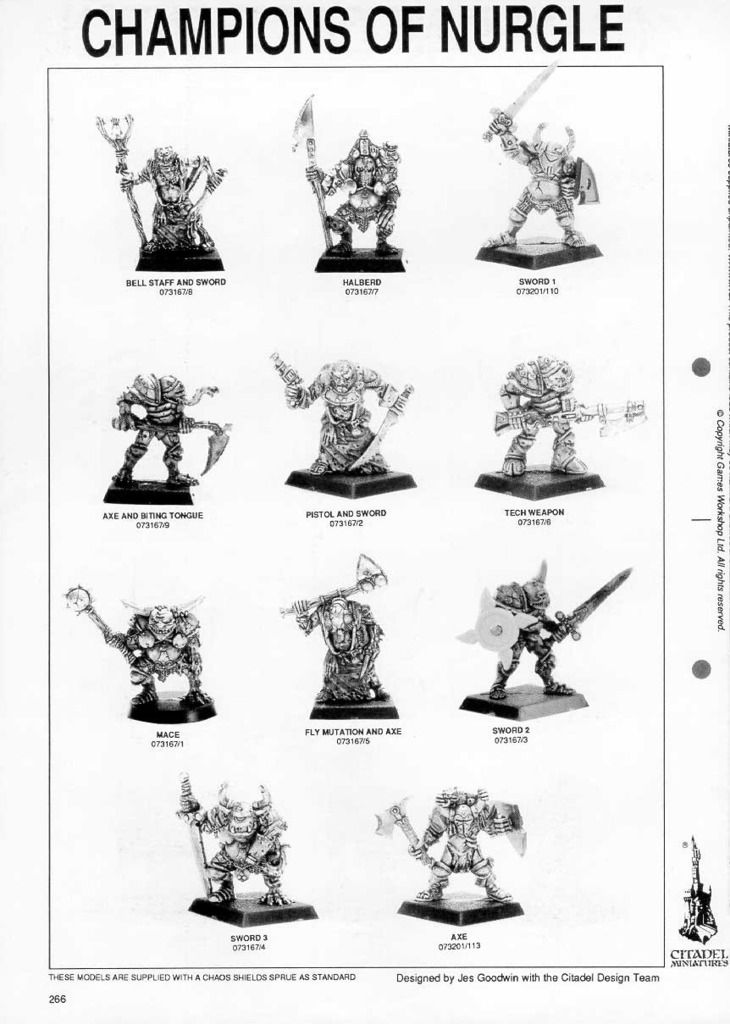
Oh and I should also say that one of the most important aspects is to conduct image research at the beginning of any modelling project, so these are the images I used to help realise this simple build: